Friends, if you use Windows laptop or desktop, then you must know that in the Windows family, we all get to see a very cool and best feature which is to enable or disable the USB port of our laptop or desktop. But many people do not have much knowledge about that feature or many people think that we can disable or enable the USB ports of our system only by using third party software’s or antivirus.
In today’s article I will tell you one of the best feature of windows is that enable or disable USB port using Registry Editor. We can also use Registry Editor to disable or enable USB Ports in Windows 11.
Friends as you all know, often we have to share our laptop or PC with someone else or with our friends and that person may also have a pen drive or external drive with virus, that person can inject these malicious files into the system, it will harm our system as well as our data. Also anyone can steal our important documents through pen drive or external drive.
We cannot compromise in any way with our data security. Disabling USB port is a great solution to protect our device from viruses and other vulnerabilities. And when we need to use USB devices through USB ports then we can very easily enable these ports using Registry Editor. Using Registry Editor We can Easily Manage our System USB Ports. Anytime We can Disable or Enable USB Ports using Registry Editor.
Also Check This :- Use Gpedit to Disable or Enable USB Devices in windows
Steps To Disable The USB Ports Using Registry Editor in Windows
Using the Registry Editor (regedit), you can easily disable the USB Ports of your computer or Laptops in Windows.
- First off all, From the Start menu, search and open the Run dialog box or you can Press the Window + R key to open the RUN window.
- Type “regedit.exe” and press enter to open Registry Editor. Or you can directly search registry in windows search and open Registry editor.
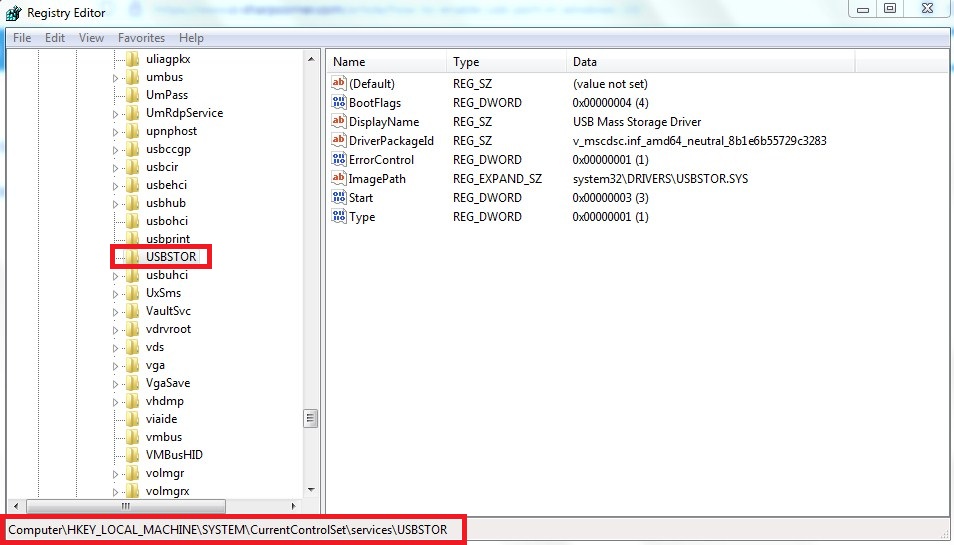
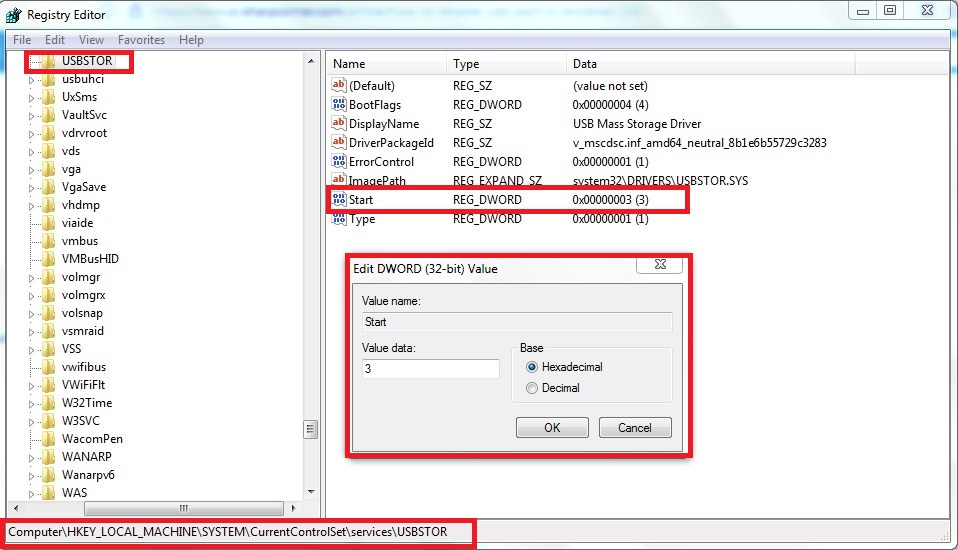
- Registry Editor Window will opened and then Navigate the following path: – HKEY_LOCAL_MACHINE —> SYSTEM —> CurrentControlSet —> Services —> USBSTOR
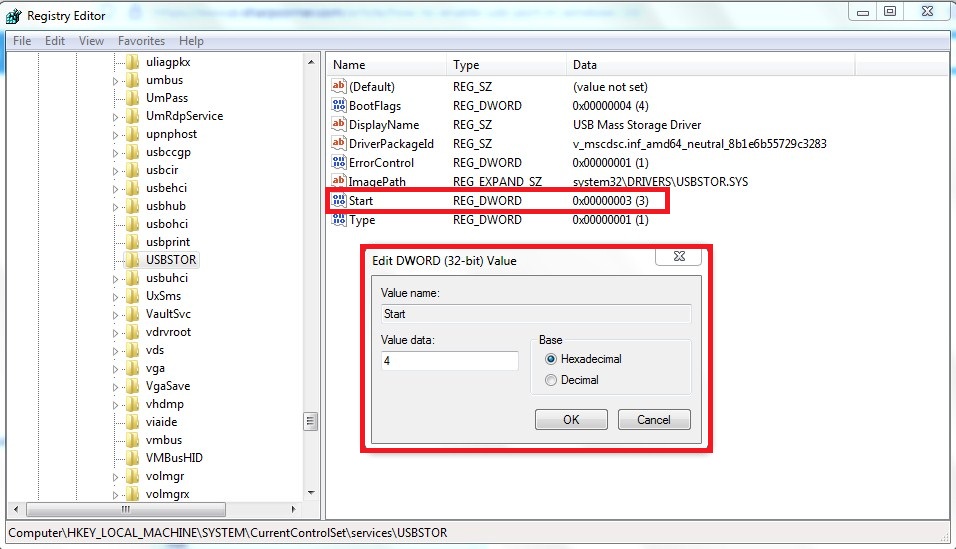
- Double Click on the start option to open the “Edit DWORD (32-bit) Value”.
- To disable the USB Ports or Drives, change the ‘value data’ to ‘4’ and then click OK.
- And Now Restart your System and check.
Steps To Enable The USB Ports Using Registry Editor in Windows
Using the Registry Editor (regedit), you can easily enable the USB Ports of your computer or Laptops in Windows.
- First off all, From the Start menu, search and open the Run dialog box or you can Press the Window + R key to open the RUN window.
- Type “regedit.exe” and press enter to open Registry Editor. Or you can directly search registry in windows search and open Registry editor.
- Registry Editor Window will opened and then Navigate the following path: – HKEY_LOCAL_MACHINE —> SYSTEM —> CurrentControlSet —> Services —> USBSTOR
- Double Click on the start option to open the “Edit DWORD (32-bit) Value”.
- To disable the USB Ports or Drives, change the ‘value data’ to ‘3’ and then click OK.
- And Now Restart your System and check.