Friends As you all know, a (VPN) Virtual Private Network extends a private network into a public network and enables users to send and receive data over shared or public networks. For example :- Many companies create VPNs for their employees so that An employee can use companies internal resources from outside like server and they can connect to the corporate network securely and complete their work even when they are out of the office.(How to Configure Windows Built-in VPN in Windows)
How to Setup Windows Built-in VPN in Windows PC or Laptop
Whether VPN for work or personal use, you can easily connect to a VPN on your Windows PC without using any third party VPN Clients. Before you can connect to a VPN, you must have a VPN profile or VPN settings, if this is for office your company will provide you a complete VPN profile with settings.
If you use a VPN for personal use, then visit the VPN service’s website to see if the VPN connection settings to use are listed. Because without a VPN Profile or settings you cannot Configure windows built-in VPN.
Also Check This :- Resolved :- L2TP VPN Can’t Connect After Windows update
Steps to Configure Windows Built-in VPN
- Click on the Start button, then type settings. Select Settings —-> Network & internet —-> VPN —-> Add VPN.
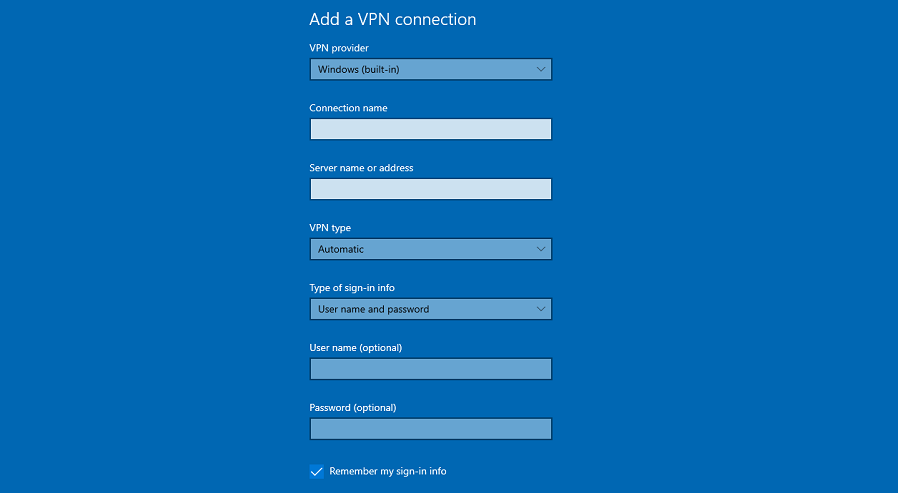
In Add a VPN connection option, complete the Following Steps:-
- For VPN provider, choose Windows (built-in).
- In the Connection name option, enter any name for your Connection.
- then, the Server name or address box, enter the Static IP address for the VPN server, Provided by your Office or your VPN service Provider.
- In VPN type option, choose the type of VPN connection you want to create. You’ll need to know which kind of VPN connection your company or VPN service uses. Like L2TP, PPTP etc..

- In Type of sign-in info option, choose the type of sign-in info to use. This might be a username and password, one-time password, certificate, or a smart card if you’re connecting to a VPN for work. Enter your username and password.
- Then Select Save.
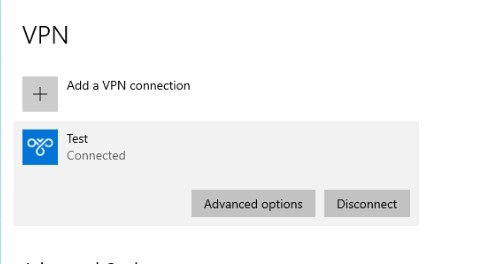
Connect to a VPN Using Windows Built-in VPN
Now you have a VPN profile in your System, and you’re ready to connect.
- In Settings, select Network & internet —-> VPN.
- Next to the VPN connection you want to use, select Connect option.
- If you’re prompted don’t worry, just enter your username and password or other sign-in info again.
Now you are connected Successfully, As soon as you are connected to the VPN, you will see Connected next to the name of the VPN.
If You Face Any Trouble while configuring or Connecting Windows built-in VPN then comment below we’ll Definitely Help you.