Friends, you must have heard the name of Outlook many times and maybe you have also used it and if you have never used it, and now you want to use Outlook or want to learn how to configure Outlook then you are at the right place.
In today’s article, I will explain you how to configure Outlook, Outlook configuration is very easy, you just need to have correct details of E-mail settings.
We have two options in Outlook, Pop and IMAP. If you configure Outlook on POP, then your mails will also be stored on your computer or laptop and the data file of outlook in POP is called PST.
Second option we have in Outlook is IMAP. If you configure Outlook on IMAP, then your mails will be sync Direct to the Server And no data of your mails will be stored on your computer i.e. all the data will be on your server only. and the data file of outlook in IMAP is called OST. We will talk about PST or OST in another article.
Also Check This :- Install Outlook with MS Office Home and Student Version
How To Configure Outlook With IMAP
- First of all you just have to Open Outlook.
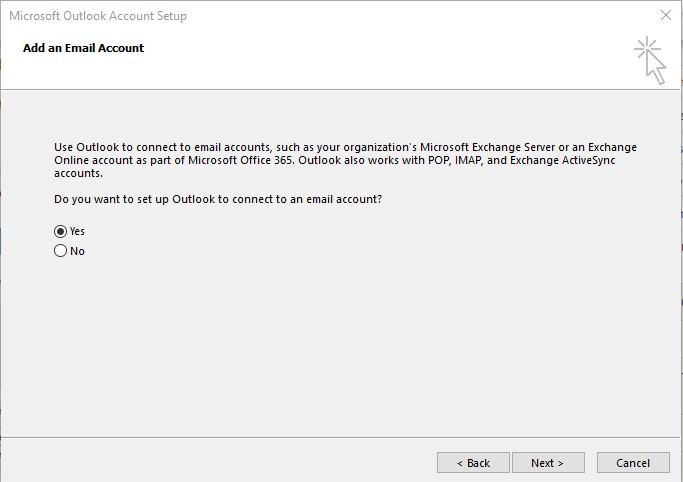
- At the Welcome screen, click Next Button.
- When it asked Do you want to set up Outlook to connect to an email account, select Yes and then click Next.
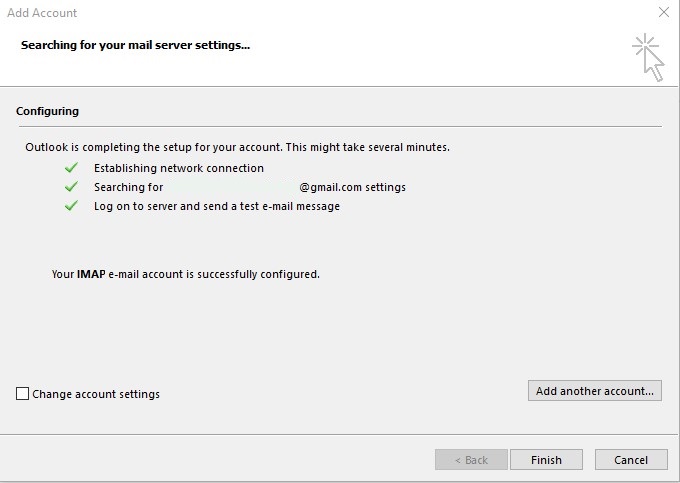
- Now The Auto Account Setup wizard opens. Enter your name, your email address and your Password. Then, click Next Button.

- Outlook will automatically complete the setup for your account, which might take 1-2 minutes. When you are notified that your account was successfully configured, click on the Finish Button.
How To Configure Outlook With POP
- First of all you just have to Open Outlook.
- At the Welcome screen, click Next Button.
- When it asked Do you want to set up Outlook to connect to an email account, select Yes and then click Next.
- Now The Account Setup wizard opens. Here you have to select Manual setup or additional server types. Then, click Next Button.
- In choose Service Page third option (select POP or IMAP) and click Next.
Also Check This :- SyncToy Microsoft Backup Tool Download
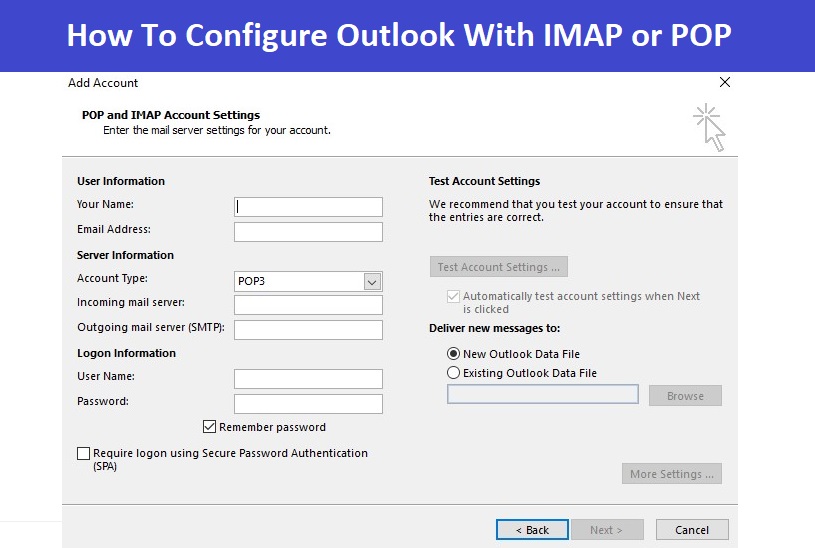
Now you have to enter Configuration Details like :-
- Enter your name.
- Enter your E-Mail address.
- In server Information(Account Type) Select POP.
- For Incoming Server, enter pop.gmail.com.
- Enter smtp.gmail.com for the Outgoing mail server. (NOTE :- The setting of your Email server may also be different, Here I have entered the mail setting of Gmail, Because I’m using my Gmail Id or Gmail server settings for Demo Configuration.)
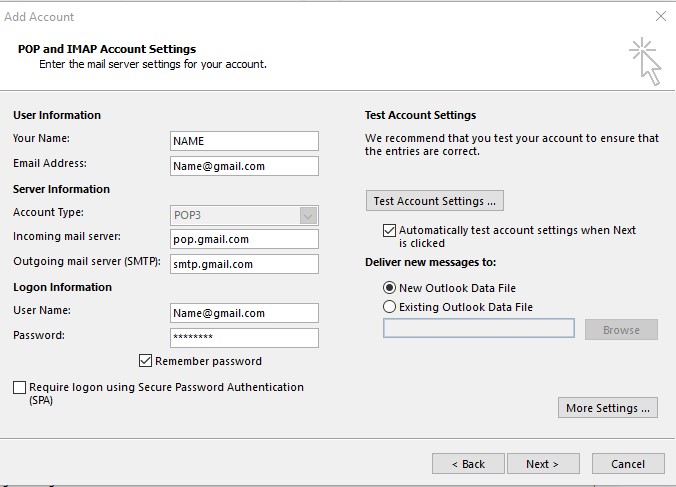
- Enter the full E-Mail address as Username and then enter your Password and then click More Setting option.
- Now in More Settings option click the Outgoing Server tab and check mark the (my outgoing server SMTP Require Authentication) Option .
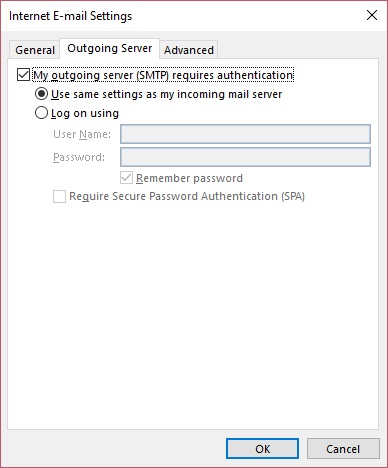
- Then click the Advanced tab to enter the encryption settings. Choose SSL in Incoming Mail Server option and then port will automatically added, and then select outgoing mail server and type port 465.
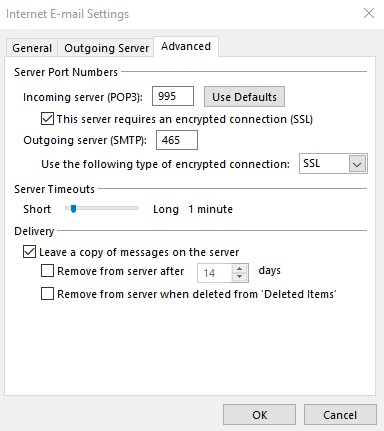
- Then click Ok Button and now Click Next.
- Then account settings will be checked, and you will see a success notification if the account has been set up properly.
Friend’s if you face any Trouble while configuring Outlook then simply comment below we will definitely help you.